Love and Heartbreak

DSC_0033 copy

I fell in love this weekend.

The kind of love that lets that uncontrollable smile sneak onto your face while you are trying to act cool around your friends and conceal how whipped you really are.

It happened at a crowded market. My heart skipped a beat and my breath shallowed. With palms sweating and eyes wide I moved closer, as if being drawn there by some consuming energy. Everything slowed down, and the world around me became a blur as I leant over and touched my love for the first time.

A pale cream thigh length, chunky knit jersey, with the most beautiful huge pastel coloured roses dotted across the body. So soft, so warm, so cozy. I saw our future flash before my eyes: cold, rainy days snuggled up in bed together, watching movies and keeping each other warm.

Speechless, I turned to my friend. ” How much is it?”, she asks. ” Only R100″ I reply. It’s so simple. I have the money in my bag. I am a note away from true happiness. And yet, I place my love back on the rail, and turn away. Up until now my “Don’t buy, only make” policy for the year has been shockingly easy, but hanging that jersey back on the rail was painful.

To rub salt in the wound, half an hour later I bumped into another friend and said, ” ah! You have to come and see my love!” and we bounced over to the rail only to find that she was gone. Gone forever. I’ll never know what it is like to be with her.

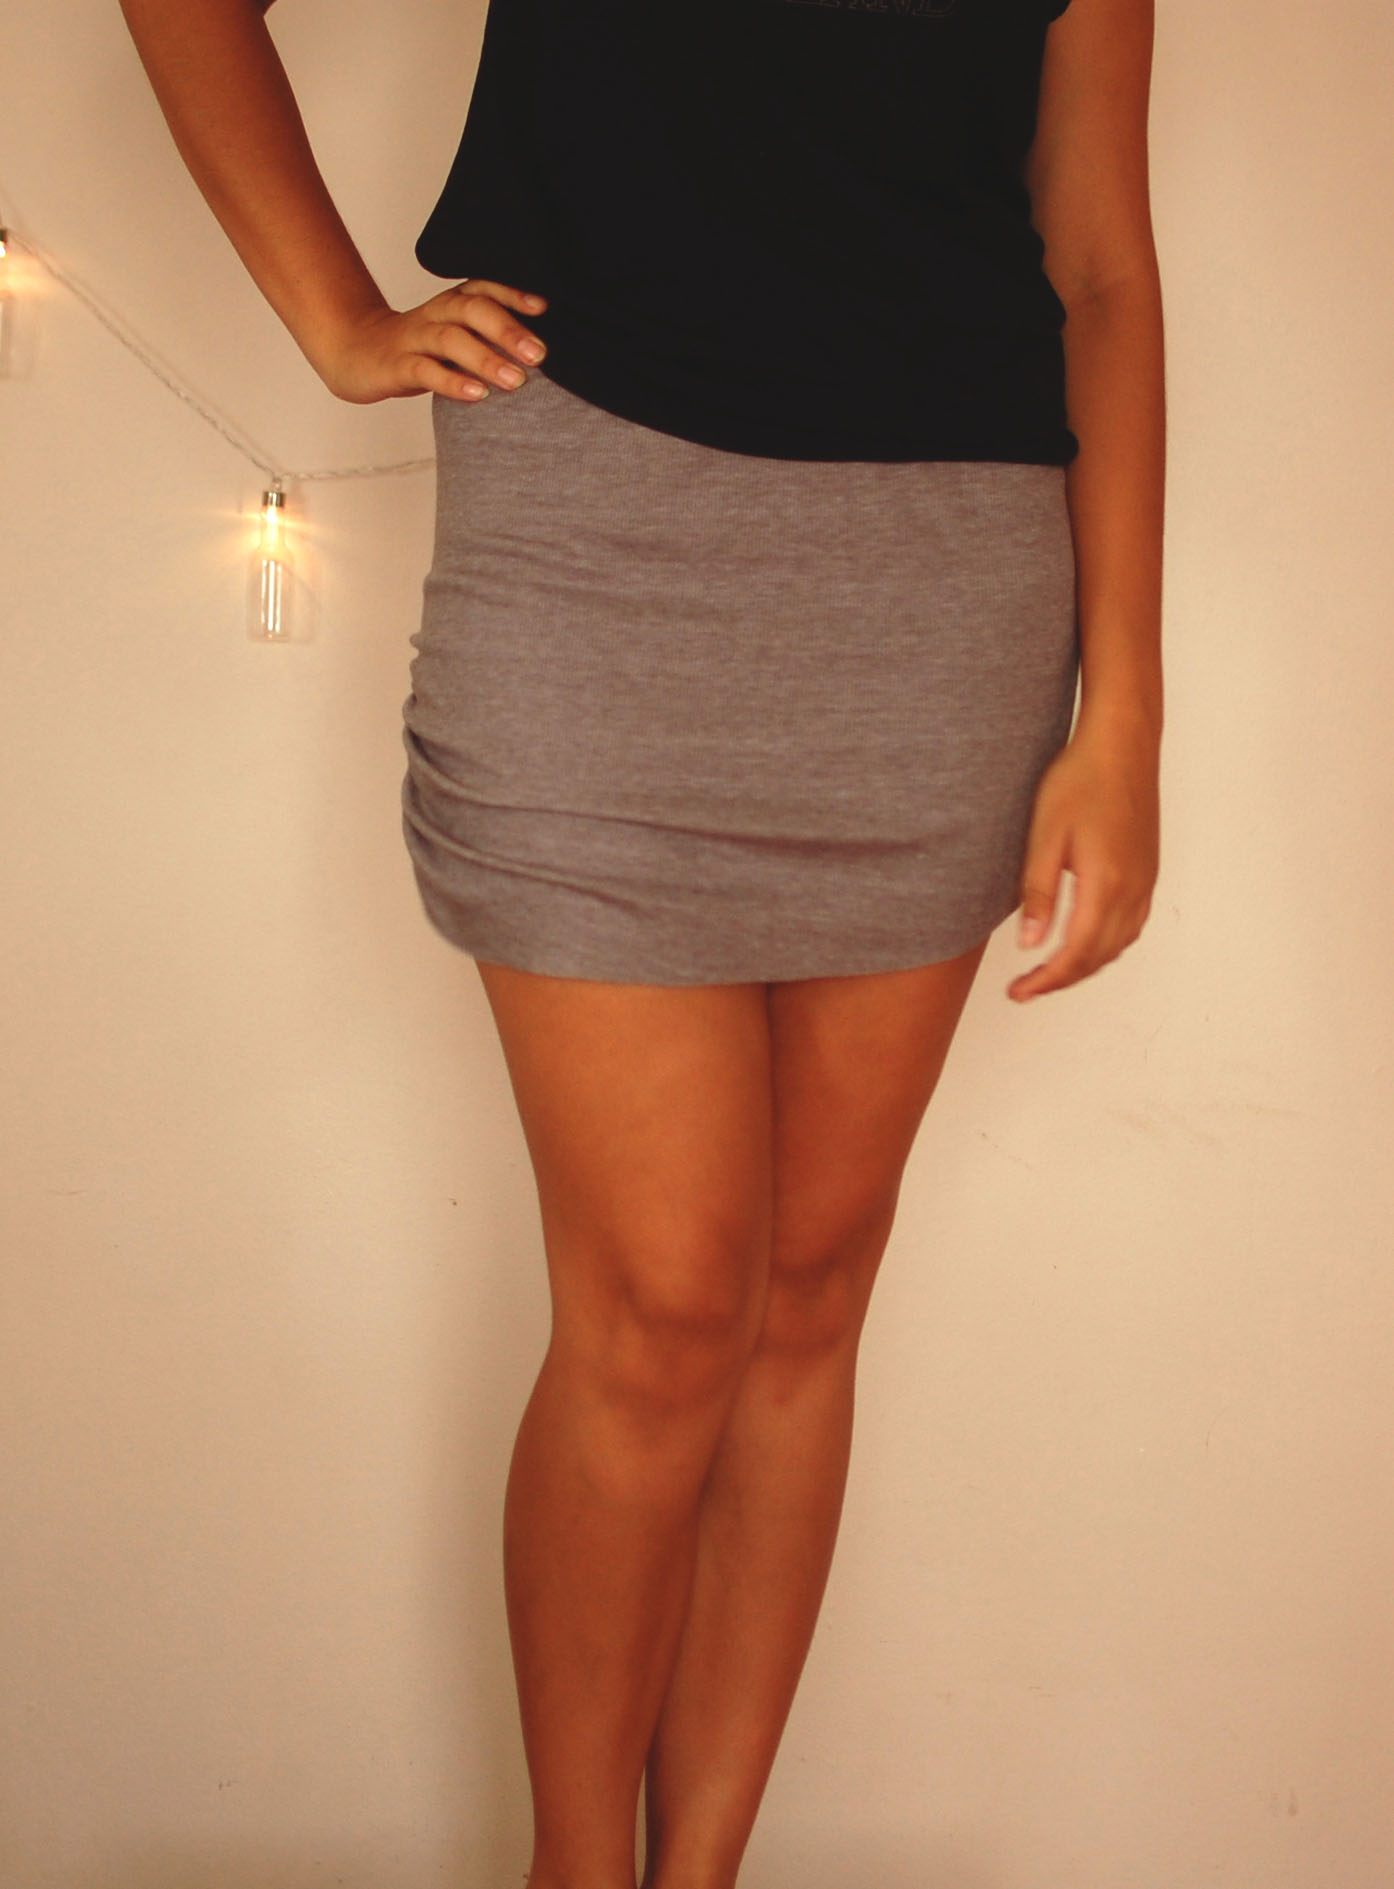
The next morning I awoke with a somewhat empty feeling as I remembered those beautiful roses. In order to fill the gap, I decided to flop around feeling sorry for myself and at the same time FINALLY take pictures of  a slouchy jersey I made a few months ago and never blogged about.

DSC_0015 copy

Initially, when I  started this challenge, I was going to allow myself to buy knitwear, because I really don’t have the energy to be knitting all the warm clothes I want, but after finding various woolen knit like fabrics (which can just be cut and sewn into a jersey) buying knitwear seems like cheating.

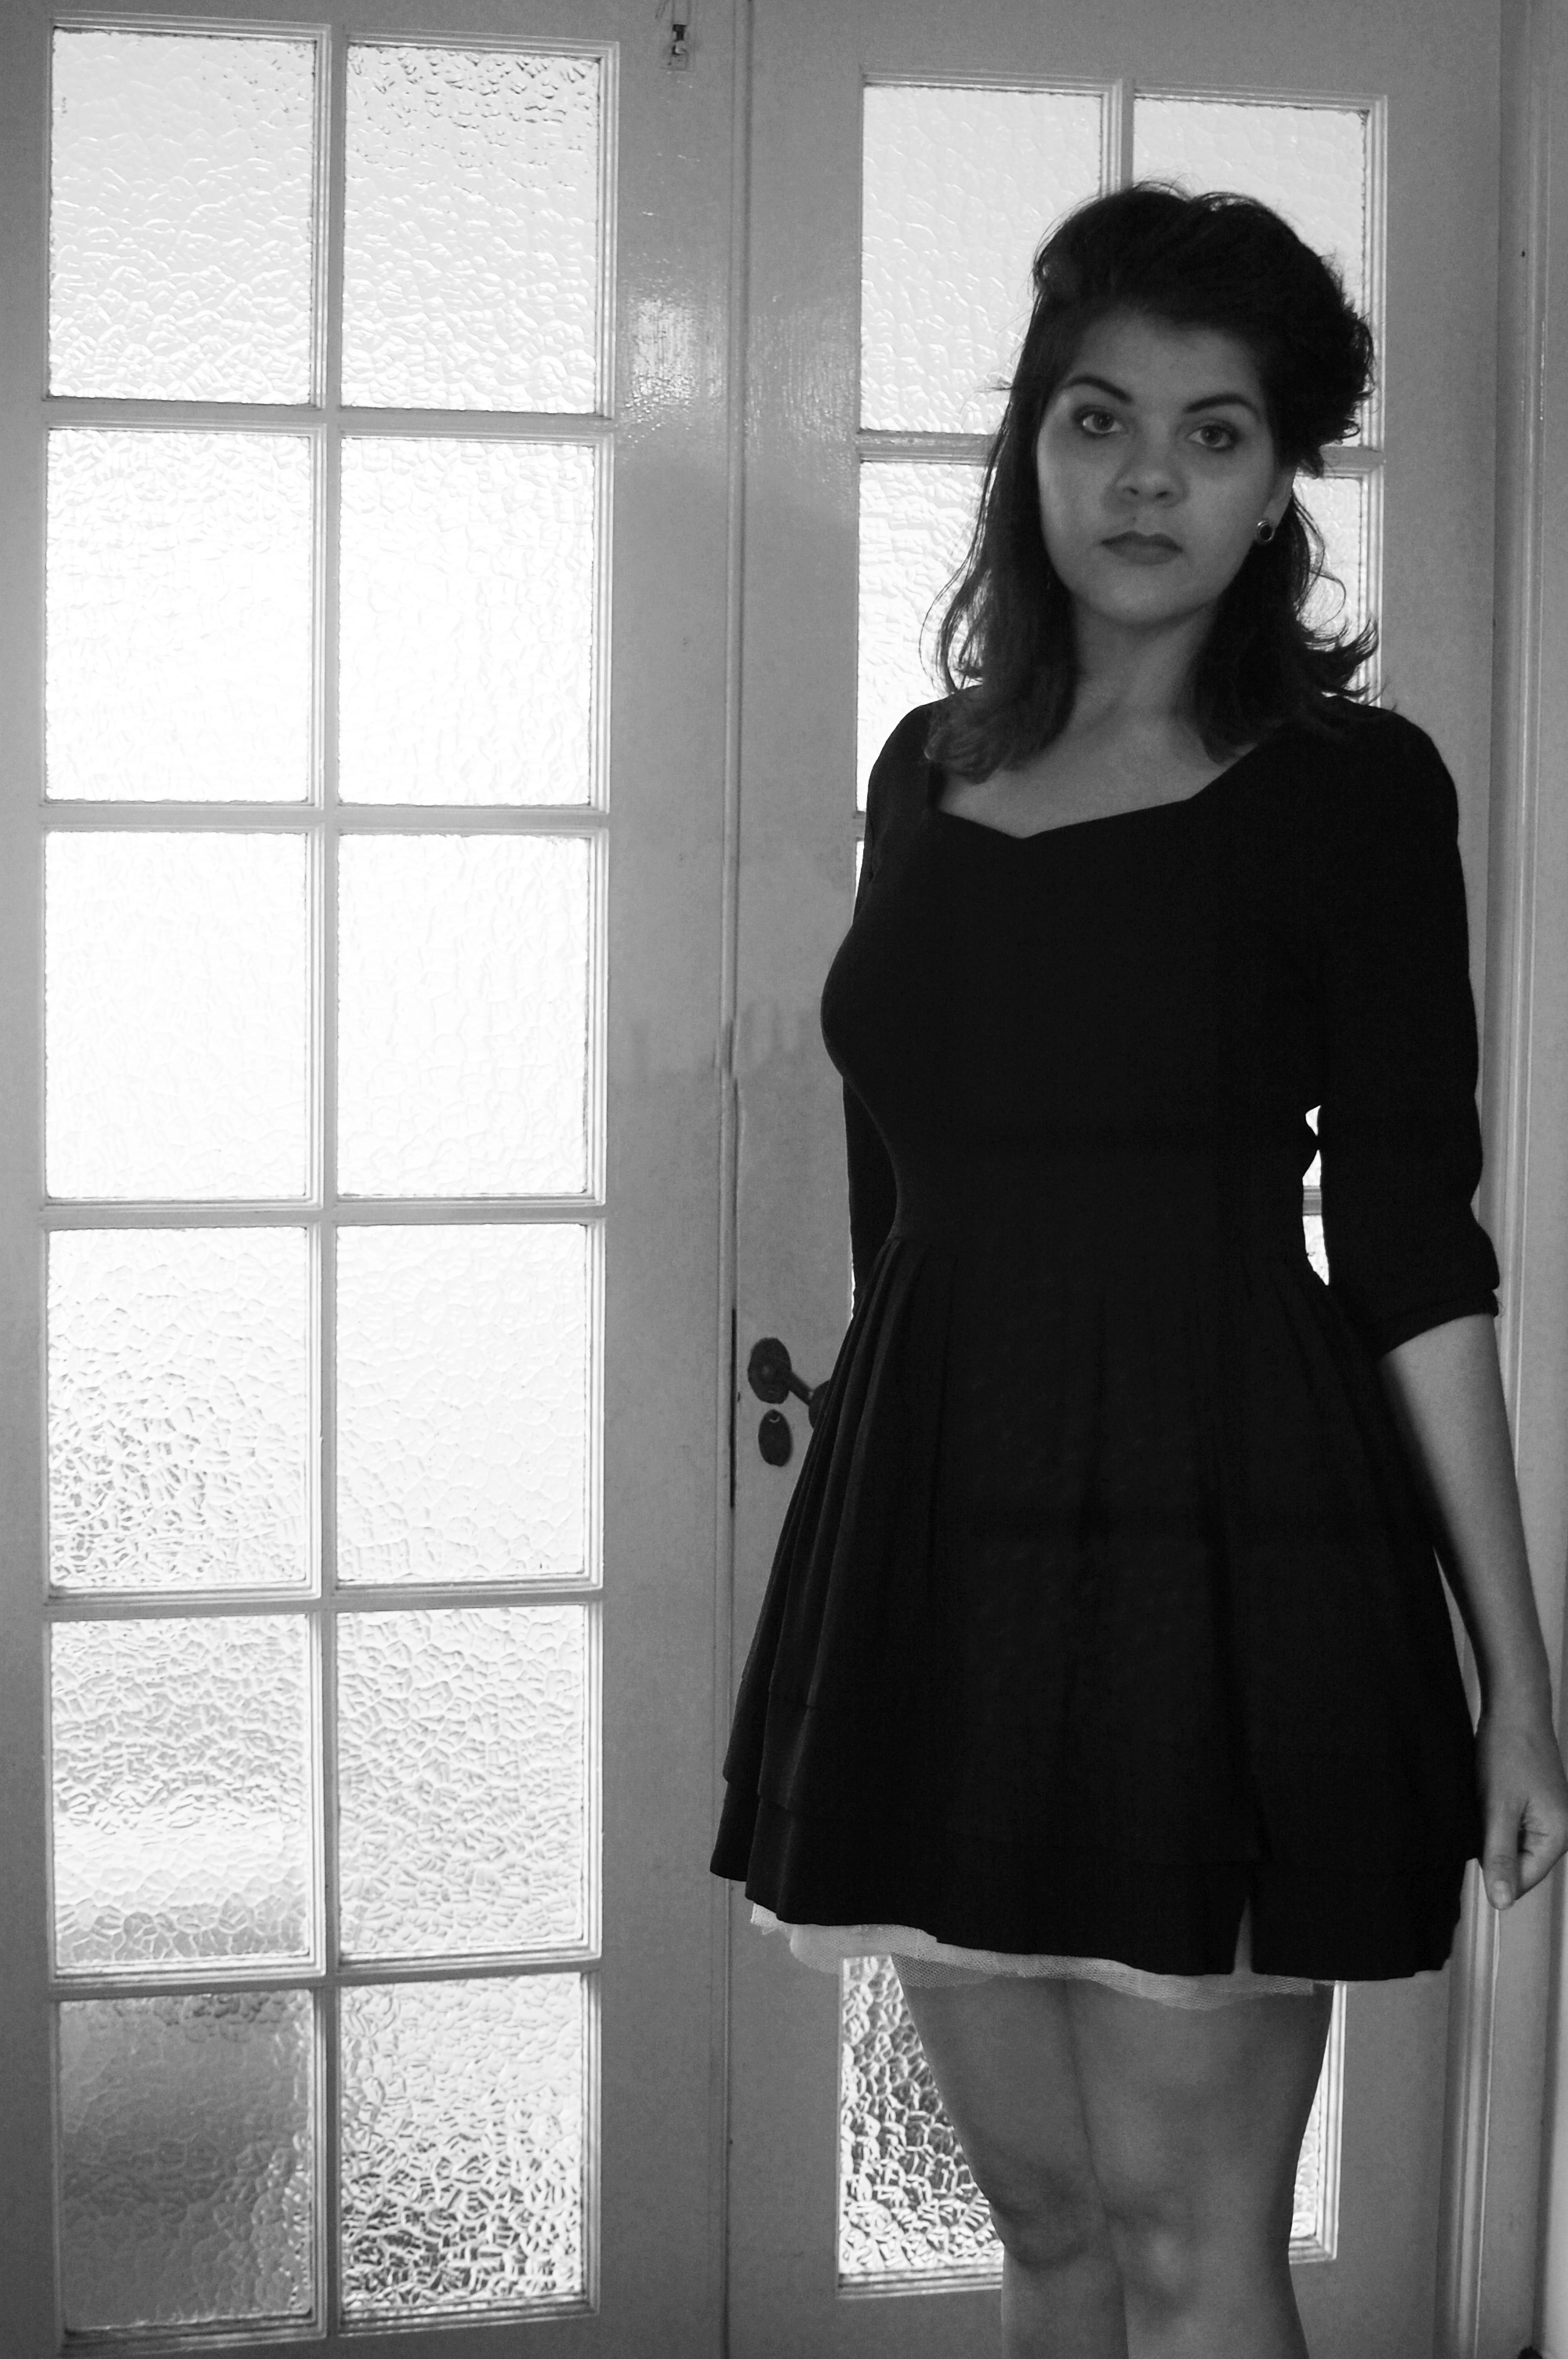
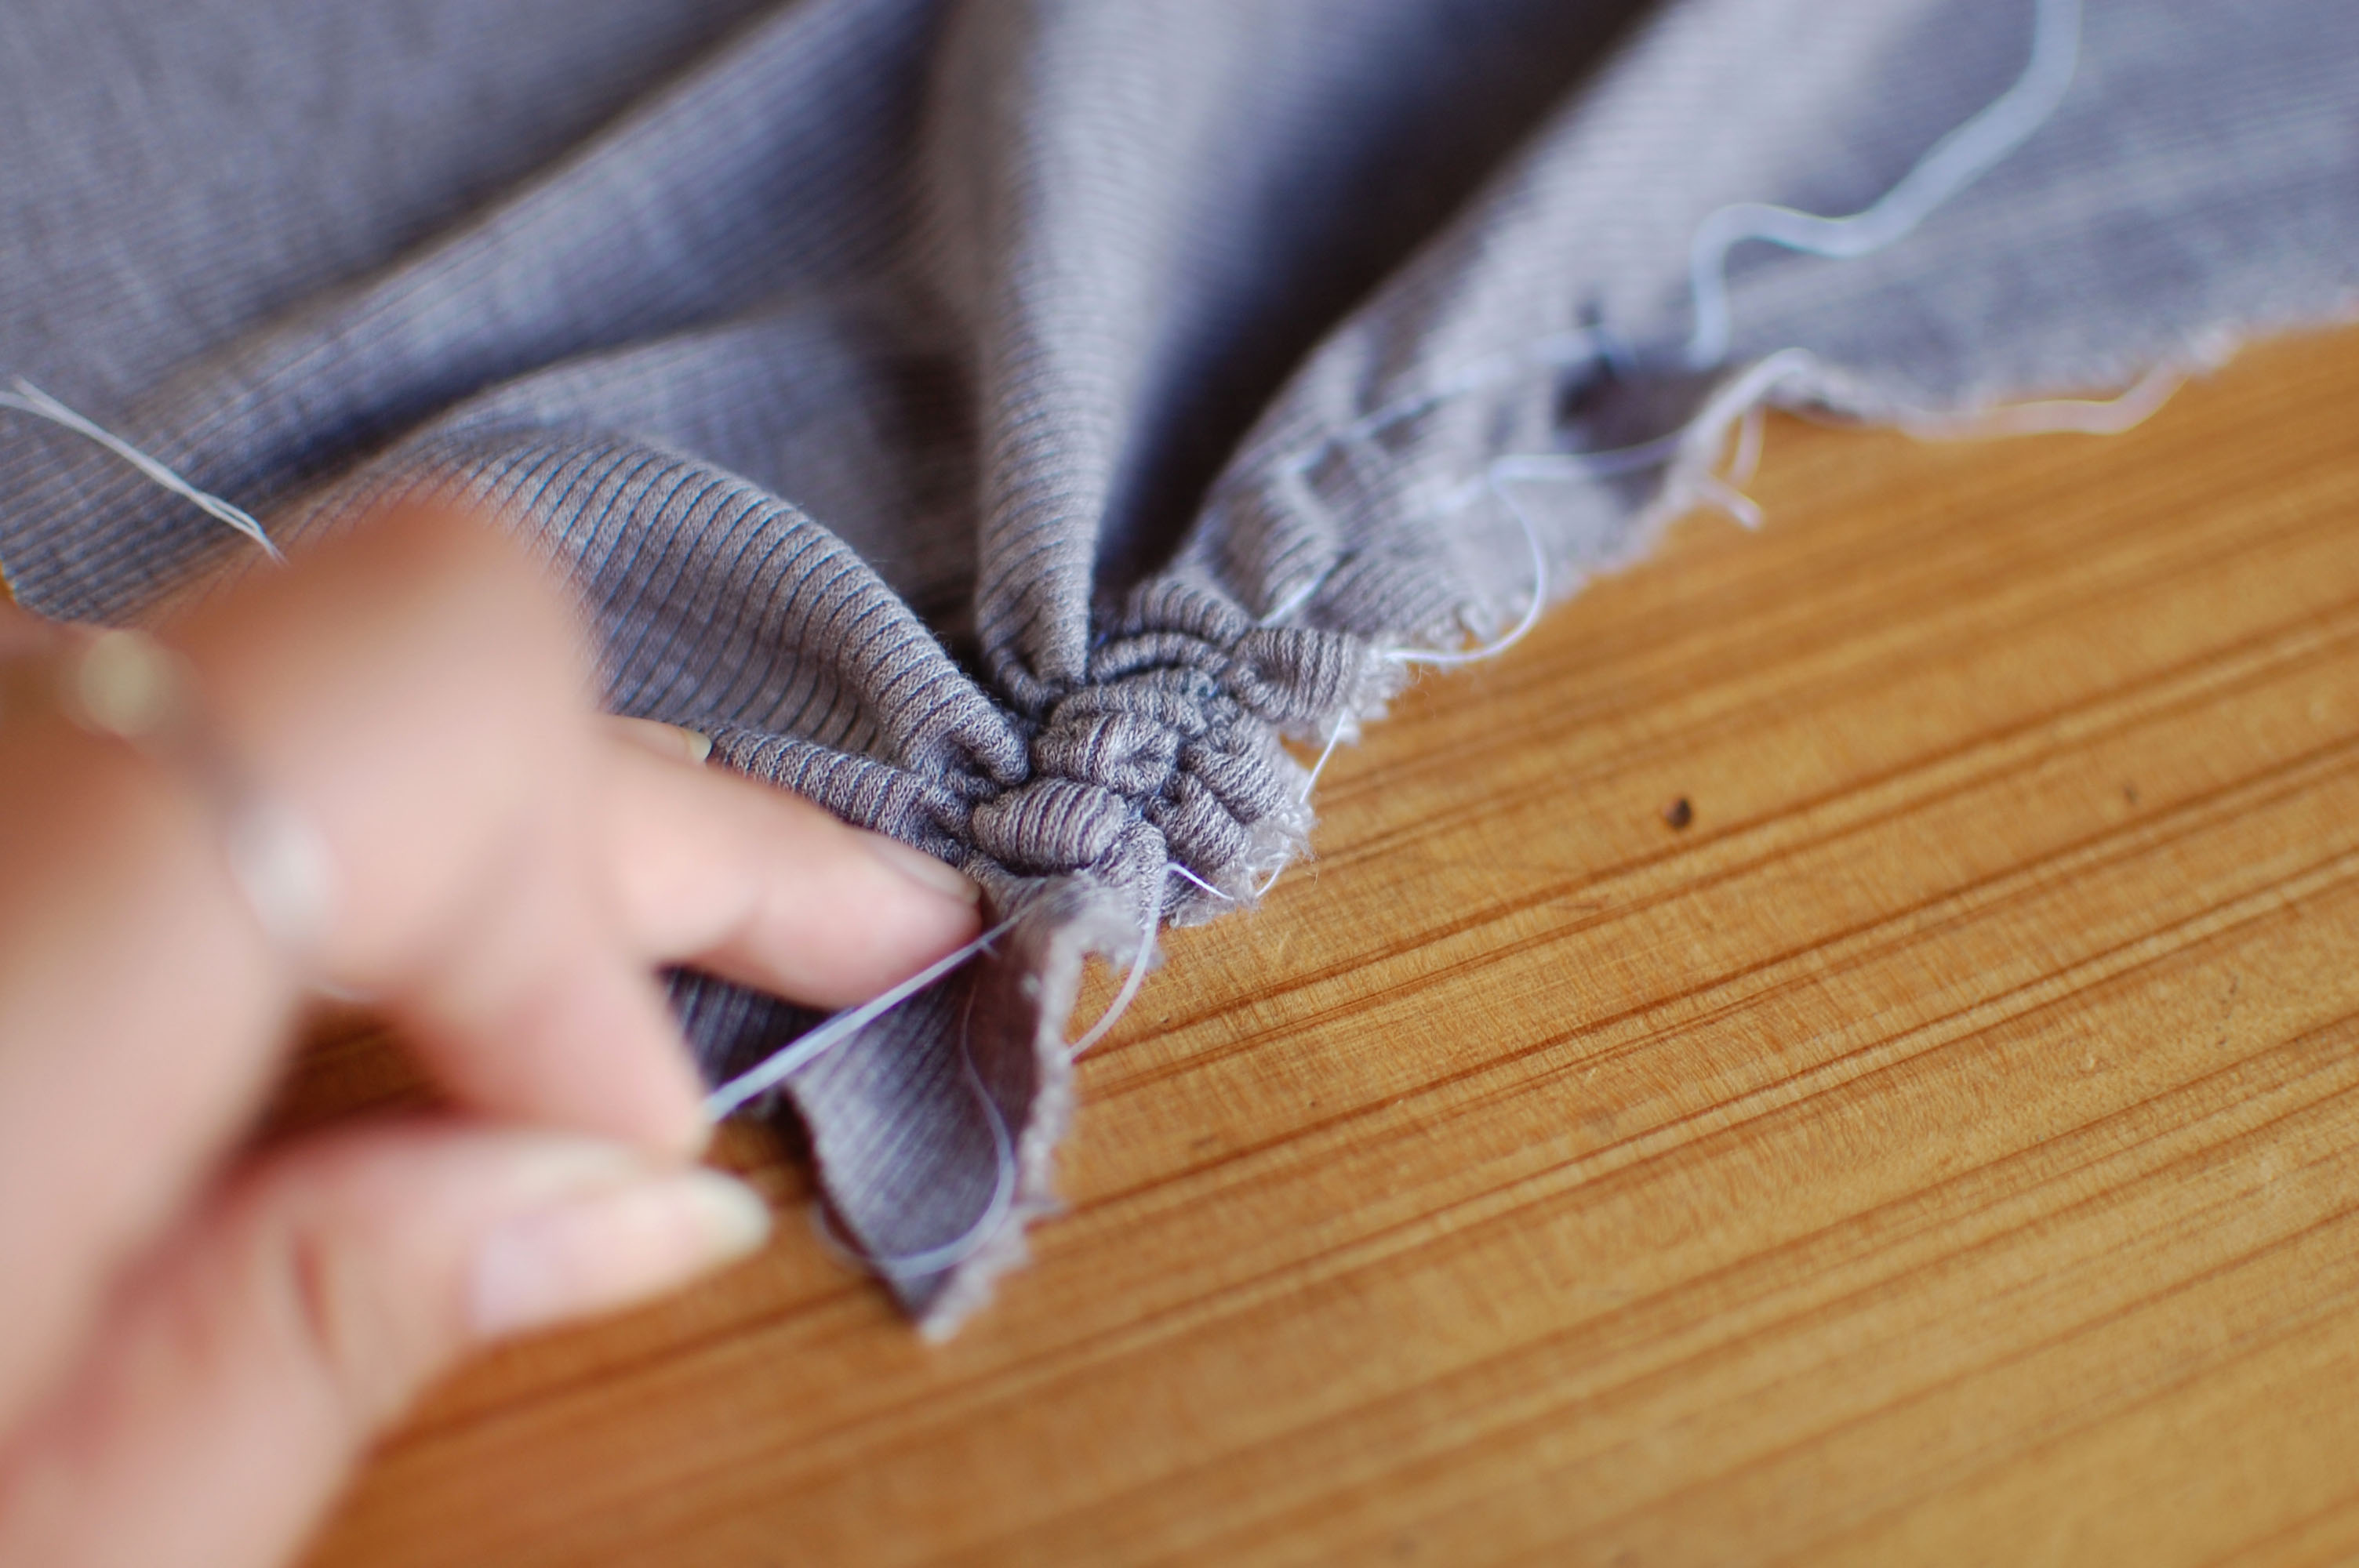
I’ve never worked with this kind of fabric before (hence why I am referring to it as woolen-knit-like fabric as opposed to whatever its actual name is) and actually found it very challenging. The neck line mostly so, and due to my lack of knowledge here, the neckline is actually a little wider than I was expecting it to be.

DSC_0019 copyHowever, I quite like how massive and oversized the whole garment is. It’s perfect for  the exact type of happiness I was imagining in my cream coloured rose jersey. It’s snugly , warm enough for Durban winter, laid back and homely.

You know, now that I think about it, I really love this jersey. Perhaps the reality of the rose jersey wouldn’t have been as perfect as I imagined it. Maybe it would have been scratchy, or pulled too tight over my wide hips, or been a bit too warm for this wonderful climate in Durban. This slouchy jersey is perfect for me, and we’ve already experienced a lot together.

I guess I’ll never know what life with the rose jersey would have been like, but life so far since I made this slouchy jersey has been pretty great, and I think I’ll choose to focus on that.

DSC_0025

By the way Mum, Dad and older brother: Don’t worry, I am wearing pants in all these pictures 😉

x

A Fresh Take on Things

DSC_0197edit

I am a firm believer in self improvement and reflection… Ugh that sounds so lame. Lemme try again…

I am a firm believer in Beyonce.

Thats better.

I remember a time when I would pull all the curtains in the lounge shut, close the door and pull my sisters single of  “Survivor” by Destiny’s Child out of its cardboard sleeve, pop it into the only hi-fi in the house, press play, and dance on my own, like a sassy little soul sister and sing at the top of my lungs.

Now all I have to do is push play  on my laptop… Point is, those sisters know what they are talking about. I really believe that we are all responsible for what happens in our lives, and are responsible for dealing with the crap, and owning the outcome.   Shit happens to the very best of people, but all you have to do to get over it is to pick yourself up, be honest with yourself, and do whatever you can to make yourself feel strong again. And for me, that is singing to Destiny’s Child and/or Beyonce. HAH, but seriously.

(The sewing part of this blog post is just round the corner don’t worry)

DSC_0122 edit

I’ve had this old grey sweater for ages, and I’ve been wondering what to do with it for as long as I have had it. When I saw Beyonce strutting in her undies, knee pads and an oversized sweater in her 711 music video, the idea popped into my head.

The next time I was at one of my favorite shops, Craft Concept, I checked trough all the iron on letters they had, and carefully spelled out ” FRESHER THAN YOU”.  Sometimes, when you feel like a rotting potato, the best thing to do is make yourself look absolutely fresh, and I promise you, you will feel FRESH.

DSC_0127 edit

So, at home, I proceeded to do all the measurements and lay out all the letters and use my phone as a calculator because my maths brain is also a rotting potato.

And then to iron everything down. I’m showing you pictures of the process so you can see how absolutely stupidly easy this is, and if you want to, you can do it yourself. DSC_0144 edit

Once that was done (make sure you iron all the corners down really well because otherwise they will start to lift off and be hella irritating) I put on some Beyonce, stood in front of my camera and acted like I am Oh so much Fresher than you.

DSC_0206 edit

It’s great because now, whenever I am feeling exceptionally rubbish, I can literally throw on my sweater, a pair of leggings and some sneakers, and feel 99% greater about myself. Even though I know we are actually all on the same level of freshness, sometimes it helps to just feel cooler than everyone else for a tiny bit.

DSC_0205 edit

Thanks Queen B , and also shout out to Destiny’s Child and my sister ( for buying that single), who would have thought your teachings would come in so handy to this little sassy soul sister.

x

My Beautiful Gran

Gug

I was lucky enough to visit Germany, my grandfathers home country, with him and my grandmother a few years ago. One evening, while staying in a sweet B&B in Munich, my gran said to my grandfather, ” Emma and I will just pop down to the shops and get some food and then we’ll come back and eat it here.” My grandfather, who’s eye site at that time was not very good, replied,  ” You can’t go. I’m lost without you.”  My Gran took a second and then responded by saying, ” And I’m lost without you, my Tatty.”

If there was ever an inspirational couple when it comes to long lasting, adoring, and completely generous love, it was my grandparents.

My beautiful gran, whom we affectionately called Gug, was always present. Every  memory I have, from school plays, sports days, frolicking around like a fairy, singing to myself while colouring in, writing exams, school dances, gap year adventures, love, heartbreak, accomplishment, she’s been there. Even when she hasn’t physically been by my side, she was still there.  She has always been a most loving, cheeky, affectionate, and supportive presence in my life which I am immensely grateful for.

IMG_3628

As you can tell from the photo’s, Gug was absolutely drop dead gorgeous. From what I can tell, and from what my mum has told me about when Gug was younger, she was always very fashionable and looked beautiful in everything she wore.

She kept a few of her clothes from her younger days, and a few years ago I was lucky enough to be given one of her old dresses from when she was about my age. My mum wore it for a while in her 20’s as well , and now it’s my turn. I’ve only worn it once or twice and I have made a few alterations to the dress such as putting in a new zip and playing with the hem line. I am going to start incorporating it more into my everyday wardrobe as its such a warm reminder of how wonderful my gran was, every time I wear it.

I thought I would be a nice way to tribute my gran on my blog, by posting about her beautiful dress.

DSC_0223 edit2

DSC_0232 edit

The dress is out of a heavy black crepe fabric and is quite stiff. The label in the dress says “Ann Desiree”, which I googled but couldn’t find anything about. When my gran owned it, the skirt of the dress was two layers. I have only kept the top layer, but the second layer was a more fitted skirt that extended to just past the knee, with a slit at the back, very glamourous.

DSC_0220 edit

I am so lucky to have had Gug in my life for so long, and although she isn’t physically here anymore, I know she will still be by my side through the rest of my journey, just like she has been my whole life.

x

Don’t be scared

Untitled-1” I sent you an email Emmills. Don’t be scared!”, I read the message out aloud to Lauren as we sat on the beach having a sneaky Friday afternoon glass of wine. We looked at each other with wide eyes and both knew –  something had gone wrong with the dress!

The message was from Jolene, a friend of mine who was getting married three weeks later. I quickly checked my email and sure enough, there was an email from Jo, in a tiny panic about her wedding dress. She had ordered a dress online and what had arrived was completely different to what she had ordered. Having tried a few other options which hadn’t worked out either,  Jolene was three weeks away from her wedding without anything to walk down the aisle in.  She asked for my help. Heart beating fast, nerves and excitement running through my body I replied “I am at your assistance!”

And so began it began! Three weeks to go and everything to do.

3e3f0076bf2f1fb95b40db4063507093

I was quite nervous to start with because I’ve really never taken on something as tricky or as important as a wedding dress, but knowing Jolene I knew she wouldn’t get into a panic or be too uptight about anything. Jo is one of the most relaxed, free spirited people I know and I wanted to create a dress that suited her perfectly and that made her feel comfortable and beautiful when she put it on.

Once we had come up with a design that Jo liked, our 1st challenge was to find the perfect fabric for it. Although the fabric shops we went to all stock incredible fabrics, those ladies can be quite pushy with suggesting fabrics. People hear “wedding dress” and they immediately think over the top. After searching for the right fabric for about a week we managed to find the perfect stuff!

f51843b0022087391377b936943b6605dacf4a450e5c84d6e7e3b5af56eed09eThe next two weeks were completely filled by drawing up the pattern, making mock ups, having fittings, altering the pattern, making more mock ups, having more fittings and then FINALLY cutting out and making the dress from the wedding-day  fabric.

This was my 1st time creating a pattern from scratch and Lauren, who studied fashion, leant me all of her old textbooks on pattern making and guided me through drawing up a pattern and how to get the shape we wanted and the fit we needed. I must have made about 4 or 5 different patterns until we got it perfectly. This was probably the most challenging part of the whole process for me, but I learnt so much and understand patternmaking in more depth now. Nothing like having to make a wedding dress to force you to learn something new. 14730_10153030567965412_7288827140545087319_n883dd33a7f97eb5722663fa7bf2b2462

Once the pattern was correct and the mock up fitted Jolene nicely, I started on the actual dress. It was quite entertaining trying to keep all 14 meters of the creamy fabric clean while cutting it out on the dining room table with two dogs running in and out with dirty paws!

Sewing up the dress was actually a lot easier than I expected, although there were a few messages sent to Lauren, while fighting with my machine, saying ” Nope. I can’t do this!!”. The hem was by far the trickiest part. After Jo had had her final fitting on the Wednesday before the wedding, I took the dress home to get my mum’s help  with the hem. We both thought her overlocker could do a double rolled hem, which would be perfect for the hem, but it didn’t. We tried for hours to get a perfect finish on scraps of fabric and we both felt a bit panicked, frustrated and nervous that we would mess the whole dress up by ruining the hem. Eventually, we decided on a stitch to use, and actually overlocked the hem inside out as we liked the look of the back of the stitching rather than the front. It was a huge relief to have it work out!c3ae25b15fd9354ff665a2fd3d560412

On the morning of the wedding I woke up at 5am, nervous and restless. I was terrified that Jo was going to show up at the wedding wearing something completely different because she had decided she didn’t like the dress I had made, or that something had gone wrong and the dress was ruined. Waiting in the chapel I had butterflies in my stomach and I think my hands may have been visibly shaking, but I think I played it pretty cool.

11001564_10152534161396157_761479338135271273_oWhen Jo walked in, she looked absolutely breathtaking, and she was wearing my dress! As she walked down the aisle to “Fields of Gold”, there was not a dry eye in the room. It was perfect. She looked perfect. Pride swelled up inside me, and although I was mostly happy-crying because Jo looked so beautiful, I may have snuck in a few tears of joy that were just for me.

6694fafbb082989234225e800c14bc00This is why I make clothes. Because they are so much more than a few bits of fabric held together by a few bits of thread. They are an expression of ourselves, a portrayal of our feelings, a visual depiction of who we are. I feel absolutely honored to have made Jo’s dress and been so much a part of her and Piere’s wedding day.  
3d00e838ce27f8088b34f6ccbee69caeCongratulations you two! Here’s to a life of love, happiness and going with the Flo

x

Crafty Cousins

This past week I was lucky enough to spend a night with some of my family who live up in Pretoria.  After a lovely day filled with coffee, brunch, second hand stores and lots of time in traffic, we all flopped down on the couches in their house with a cup of well deserved tea. No sooner had I sat down when my youngest cousin Helen said to me, ” Emma, I was wondering if you could help me with some alterations to a dress I have?”.  She showed me the dress and we assessed what it was that she wanted to do with the dress and what was possible and then we hauled out my aunt’s old sewing machine.

As we were about to get started Helen suggested that I take a before and after pic to put up on my blog. It was a great idea and I love how the project evolved. Have a look at the BEFORE picture:

Untitled-1Helen has fashion illustrations which she has drawn stuck up all over her room and she has designed some incredible things, from a trendy day to day look to formal dresses to outrageous costumes. She definitely has an eye for clothing design and it was fun discussing and sharing ideas of how we would alter this dress together.

To start with, it is quite a pretty dress with some cute details and the fabric is gorgeous and really suits Helen, however, it’s far too big for her and looks a bit frumpy. We decided to elasticate the waist, add a contrasting bow  and shorten the hem.  IMG_2783Doesn’t it look sweet! After we had elasticated the waist Helen stood in front of the full length mirror and I chopped the dress shorter, making her hold the measuring tape under her big toe to make sure we were getting it all the same height.

I had to giggle to myself when we were deciding on the length of the hem. It went back and forward a few times with me saying, ” Ok, so to about here?” and Helen responding, ” Or like here?”, signalling to a length a couple of inches shorter than where I had suggested.  The length looks great and she sure has the legs to pull it off! IMG_2792
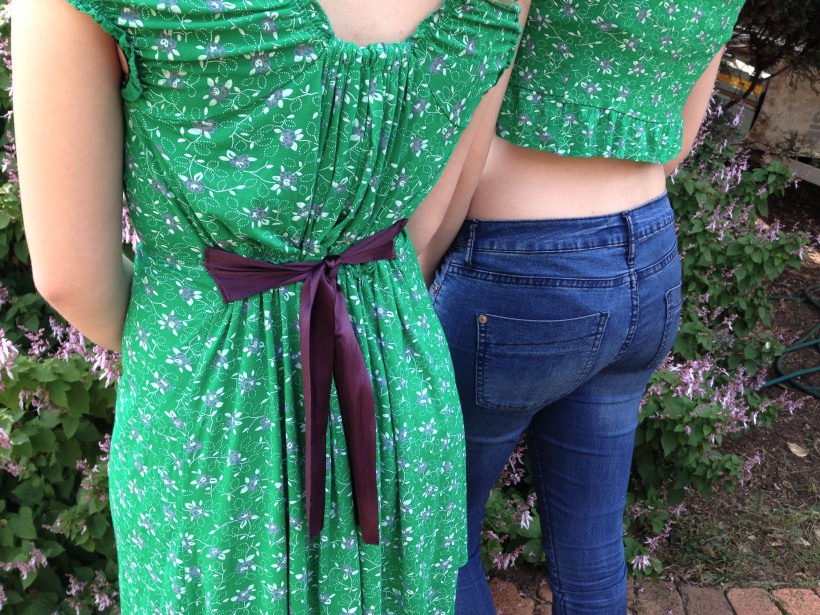
We all noticed right away after lopping the hem off that the piece of fabric left over seemed rather functional and would be a waste to throw it away. My other cousin, Megan, had been sitting with Helen and I through the process of altering the dress and as I held up the leftover fabric we both said, ” Oooh! We could make a crop top out of that!” and so that’s what we did.

It took about another five minutes to do as I just measured the fabric up against Megs, cut it straight, folded and sewed the top over and threaded elastic through  the fold to hold it up.

IMG_2796

I had such fun working on this with two of my drop dead stunning cousins. I am so thankful to come from a family where creativity is always encouraged, even if it means half an hour of my aunt and I fighting with her old sewing machine that didn’t want to thread properly, in order to create something awesome.

Nice work Helen and Megs! I hope you enjoy wearing your new items of clothing, just make sure you co-ordinate so you don’t end up wearing matching outfits on the same day. Unless you are into that, in which case do it because you look like sweet, loving sisters dressed like this 😉

x

IMG_2798

#4 – Navy Shorts

Processed with VSCOcam with f2 preset One of my all time favourite  items of clothing is a trusty pair of high-waisted shorts. In fact, I only own one pair of shorts that aren’t high-waisted and they are looking rather tatty so I’ll throw them out soon anyway. High-waisted shorts can be dressed for any occasion; picnic, beach day, clubbing, a smart dinner, and that is part of the reason I love them

All the high waisted shorts I own are from second hand stores, and most of them were granny trousers before I chopped them off to be cute and playful shorts. So, with Durban winter on its way ( which, let’s be honest, is much more enjoyable than Durban’s summer ), I thought I would attempt to make myself a smartish pair of shorts.

image4

I have a wonderful pattern by McCalls which has a number of short designs to choose from. I went with this design as these shorts feel quite classy, they have more of a sophisticated look to them while, still fitting into my youthful and easy-going look. I am attempting to add a few items to my wardrobe that have a more “grown up” look to them with out being boring and too formal. I still want to wear short shorts and look fly, I am only 23 after all. A good deep navy is always a winner for looking smart and is a great neutral that can be paired with just about anything.

Processed with VSCOcam with f2 preset

Processed with VSCOcam with f2 presetAs some of you noticed, it has been a while since my last post. This is partly because I was making a wedding dress for a friend of mine ( blog post on that still to come) and partly because I find the photographs the most frustrating part of this blogging process. My wonderful friend Micaela is a wizard with a camera and she offered to help me with photos. We spent the morning together giggling about how awkward I am in front of the camera, trying to ignore the mosquitoes which were eating me alive, and taking some great photos of my shorts. Thanks so much Mics!

Processed with VSCOcam with f2 presetI am really happy with how these shorts turned out. I have tested them out and so far they are good for everyday general use, breakfast dates and a good little dancing session. I hope you like them too

x

#3 – The 45 minute skirt

DSC_0068 While chatting to a few of my friends yesterday about what a busy week I have to look forward to and how I was worried I wouldn’t have time to make anything for the blog, one of them jokingly said, ” Just make a skirt with some elastic”. Well, it turned out to be a pretty good idea. Because this skirt was so simple to make, I thought I would do this post a little differently and walk you through the process of how I made it, just in case you want to make your own one.

You will need:

  • a stretchy fabric of your choosing ( I used a grey Melange, just because I had it lying around)
  • a tape measure
  • a pair of scissors
  • elastic (thick or thin)
  • a sewing Machine
  • 45 mins ( or half an hour if you are a pro)

Step 1 : So. To start with you need to decide how long and how tight you want your skirt, and measure yourself accordingly. Then you will cut three pieces of fabric for the skirt, two of them exactly the same size, and one 10cm longer on the one side.

Untitled-1My dimensions were 50cm (width) by 40cm (height) with the longer side of the third block also being  50cm. I got to these dimensions by measuring the circumference of the widest part of myself, around my sweet booty, and then dividing that by 2 to get the width of the fabric, and then from my hips to the place I wanted to skirt to come up to on the leg, and adding 4cm for the waistband. Does that make sense?

Step 2 : You will now make a gather along the longer side of the 3rd block. I made my gather 15cm.

DSC_0020Step 3: Once you have gathered the long side of the 3rd block, you are going to lay it between the other two blocks.DSC_0041Step 4 : You will then pin these layers together on both sides ( the height of the fabric), and sew them together.DSC_0046Step 5 : Fold over 4 cm of the fabric at the waist and depending on which size elastic you have, either sew one line at 3cm, or three lines, 1cm apart and thread in your elastic. In my mind a thick elastic would work best. I only had thin elastic but I quite like the sporty feel it gives the skirt.

Step 6 : Step out looking fine in your new little skirt!DSC_0063 DSC_0062

I hope my instructions made sense. It was a lot harder to explain using words than I thought it would be. I am a more learning-by-doing sort of a person, but hopefully some of you understood!

x

P.s If any of you actually do end up making this skirt, please let me know, and show me how yours comes out!

#2- 50’s Style Dress

I have always had a soft spot for old school fashion. Every time I go to a thrift shop I spend ages looking through dusty boxes of old used patterns. They are usually about R2 a pop so you can imagine why I usually leave with armfuls of patterns.

I really enjoy mixing these old styles with bright, vibrant, chaotic prints. It gives a dress that could be horribly frumpy, a fresh young feel to it. I have had the fabric which I used for this garment sitting in my cupboard for about 2 years, and I just love it! It took me a while to decide on the right project for it, and I think I made the perfect call!

dress1This dress took me quite a while to make. With all the darts, gathers, button holes and interfacing, it’s not one of those garments you can whip up in an afternoon. I had huge difficulty pinning the gathered skirt to the bodice and after sewing it down neatly and carefully, I realised I had sewn it on back to front! At least I could catch up on a few episodes of The Mindy Project while I unpicked it.

dress3

I love the finished product, what do you think? I made the hem quite a lot shorter than the pattern instructed to add to the fun, party feel of the dress. I would love to go dancing in this dress, while wearing my white Tommy Takkies with a scrunchy in my hair.

dress7dress6dress5This was my 1st solo shoot and it was challenging. I am definitely not a photographer and most of my photo’s came out blurred. Self timer is not yet my friend. However, I think it’s a pretty good 1st attempt. Here is one more photo that came out quite nicely. Even though it doesn’t show much of the dress, it shows my great selfie skills.

dress8I hope you enjoyed this post. I would love to hear some ideas, comments and suggestions from readers!

x

#1- Pants

A little over a year ago, whilst completing my final year of my Visual Art degree, I made a pair of high waisted pants from fabric which I printed myself as part of my prac. Every time I have worn them someone has commented on how much they like them – especially my beautiful friend Sophie.

Soph and I spent the day together last week, fitting and altering the pattern to come up with a pair of pants which fitted her perfectly. Here is the end result. Doesn’t she look great?DSC_0108-RecoveredOnce we were happy with how they fitted, Soph ordered another two pairs of pants from me and we had fun picking out the fabrics together. I decided to make myself a pair as well, and these will count as the 1st item of my challenge.

DSC_0109-RecoveredI have become aware of two challenges which I am going to face during ” A year in my own clothes”, the 1st being that I am awfully uncomfortable in front of a camera. When I started this blog I didn’t think to much about the fact that I will have to pose in front of a camera, strutting my new outfits, every two weeks. I like to think that I will improve with practice – that’s how it works, right?  DSC_0146-Recovered The other challenge I have become aware of is that sitting down in closely fitted high waisted pants is a challenge in itself. At least it improves ones posture and forces you to pull in your tummy!

DSC_0150-RecoveredUntil next time,

x

(p.s. You can take a look at the pants from my Visual Arts prac, along with the rest of my online portfolio at http://emmraerae.wix.com/emmraerae )

A year in my own clothes

This year I challenge myself to a full year of hand made clothes.

Here are the rules:

I am not allowed to buy a single piece of new clothing, no matter how much I like it, but instead I have to make every new garment that I want. For every garment that I make, I must do a technical drawing (even if I am following a pattern) and for special garments, such as fancy-dress or just an actual fancy dress, I must draw a fashion illustration.

21I have a weakness for second hand clothing, so in order to incorporate that into my challenge, I am only permitted to buy a second hand item provided I make alterations to the garments. At the moment I have a huge pile of thrifted clothes which I am yet to alter, so I will begin with those. 43 I aim to produce a new garment every two weeks, and slowly but surely turn my wardrobe into a purely hand crafted collection.

So here I go. Wish me luck!

x